Showing posts with label paleo. Show all posts

Thursday, November 17, 2016

Green Egg Muffins/Casserole

Rem and I both eat eggs pretty much every day.  We love eggs all ways- scrambled, in a hash, over medium, hardboiled... and as egg muffins or casseroles.  Our 14 month old is also an egg fan!  He has been EATING UP these green egg muffins this week, which makes me really happy because they are full of nutritious protein and veggies that his little body needs!  

Green Egg Muffins


5 chicken sausage links (I used spinach feta chicken sausage)
2 c sliced mushrooms
2 c broccoli, small pieces
12 eggs, cracked into blender along with a large handful of spinach, a splash of milk, salt, pepper, and garlic powder

Line 24 muffins cups with paper liners (I like "If You Care" large baking cups).  Divide mushroom slices and broccoli pieces (roughly) evenly into muffin cups.  Slice sausage (I use kitchen scissors to do this) and split among the muffin cups (I put 3 slices in each).  Blend eggs in a blender with spinach, milk, and salt, pepper, and garlic powder,  Pour into muffin cups, filling each almost to the top of the cup.  This takes a little patience.  Just remember, perfection is not required.  Bake at 375 degrees 30-35 minutes.  They're done when the eggs are no longer runny on top and don't jiggle.  Store in the fridge and eat cold or reheat!

You could also make this in a 13x9 pan as a casserole.  Grease the pan with olive oil, coconut oil, or butter first, then layer the broccoli, mushrooms, and sausage in the pan.  Then pour the eggs in. *I like to use 18 eggs if I'm making a casserole so the egg covers all of the goodies inside,  Bake at 375 degrees for 30-45 minutes.  The time can vary a lot so just keep an eye on it- when you no longer see runny egg on top and the middle of the casserole doesn't jiggle, it's done.   

You can make so many delicious variations of these.  I love using broccoli because it gives some bulk to the muffins, but broccoli + roasted peppers + chunks of cooked sweet potato + crumbled sausage is AWESOME.  Another good combo is peppers + onions + bacon + cheddar cheese.  So many possibilities...

Just because, I wanted to share some other solid recipes I made recently- all keepers. Thanks to all of the great bloggers out there with such yummy recipes! 

Cashew Beef Stir Fry- delicious served with spaghetti squash for a lower carb/paleo meal
Asian Style Meatballs (*Breck approved!)- I used about 2 T fish sauce, ground pork, and my usual ginger paste and freeze dried garlic.
DAMY Chocolate Peanut Butter Protein Fudge- I used vanilla SFH  protein powder, maple syrup, no stevia, and creamy natural peanut butter.  I used a small cookie scoop to scoop the mixture into roughly 20 mini muffin liners that I arranged on a cookie sheet and then froze the fudge.  No need for cutting later!
Flourless Chocolate Chip Pumpkin Muffins- I used regular sized chocolate chips and doubled the amount (I love chocolate chips...).  It made 11 muffins for me.  
Creamy Crockpot Chicken and Tomato Soup (*Breck approved!)- Ok I didn't make this one, my sister did!  She is awesome and brought me some to try.  I loved it and am making it this weekend!

Friday, June 6, 2014

Banana, Blueberry, and Greens Smoothie


Wow, it's been awhile!  The end of this school year was a whirlwind, but now that I'm on break from school for the summer, I think I'll be able to update the blog more frequently.  I have quite a few yummy recipes stocked up to share... so stay tuned!  

The recipe I have to share today may look absolutely disgusting, but it's incredibly delicious, healthy, and a new favorite of mine.  Lesson: don't judge a book by it's cover.  

Rem and I are currently doing a 28 day Detox that involves drinking fruit, veggie, and soaked nut smoothies for a portion of it.  Truth be told, before doing this Detox (1 week ago) I didn't think I was a huge smoothie fan.  One short week later, I am a smoothie lover.  The recipe below is my current favorite!

Banana, Blueberry and Greens Smoothie

1 frozen banana, cut in half (I freeze mine in 1/2 banana chunks)
1/2 c frozen organic blueberries
3/4 c water/milk/almond milk (*I used homemade almond milk)
2 large handfuls organic baby spinach
30 g raw organic walnuts, soaked in a covered bowl of filtered water for 4-8 hours OR 1/2 avocado

You have a few options here:
Option 1: You can throw everything in a regular blender and blend it until smooth.  I like my smoothies thick, and I actually eat them with a spoon rather than drinking them.... but if you want a thinner smoothie, add more water/milk/almond milk.  
Option 2: Put your spinach and almond milk in a single serve magic bullet and blend until smooth.  Then add the banana, blueberries, and walnuts OR avocado and continue to blend until smooth.  

Tuesday, April 8, 2014

Cracked Nut Butter Copcycat Recipes: Brownie Batter Nut Butter and Cinnamon Roll Nut Butter

I do not have pictures... but I felt that I needed to get these recipes out into the world!  I've never had Cracked Nut Butter, but people seem to love it!  When my friends placed a recent order for it, I decided to try making it myself, and although I've never had Cracked Nut Butter, I created two copycat versions that I think taste pretty darn good!  Try them and see if you agree!  I'd like to know what you think!

Brownie Batter Nut Butter

1 1/2 c raw almonds
1 1/2 c pecans
1/2 c unsweetened shredded coconut

Process the above ingredients in a food processor until a smooth nut butter is formed.  Then add:

28 g chocolate whey protein powder (I used "Tera's Whey")
1 T cocoa powder
1 T coconut oil (melted)
1 T Ghee (melted)

Process again until uniform.

This tastes good straight out of the food processor but is even better after it has been refrigerated for at least a few hours!  I stored mine in a mason jar.


Cinnamon Roll Nut Butter

1 1/2 c raw almonds
1 1/2 c pecans
1/2 c unsweetened shredded coconut

Process the above ingredients in a food processor until a smooth nut butter is formed.  Then add:

1 scoop (approx. 28 g) vanilla whey protein powder
1 T cinnamon
1 T coconut oil (melted)
1 T ghee (melted)

Process again until uniform.


Saturday, February 15, 2014

Paleo Moussaka

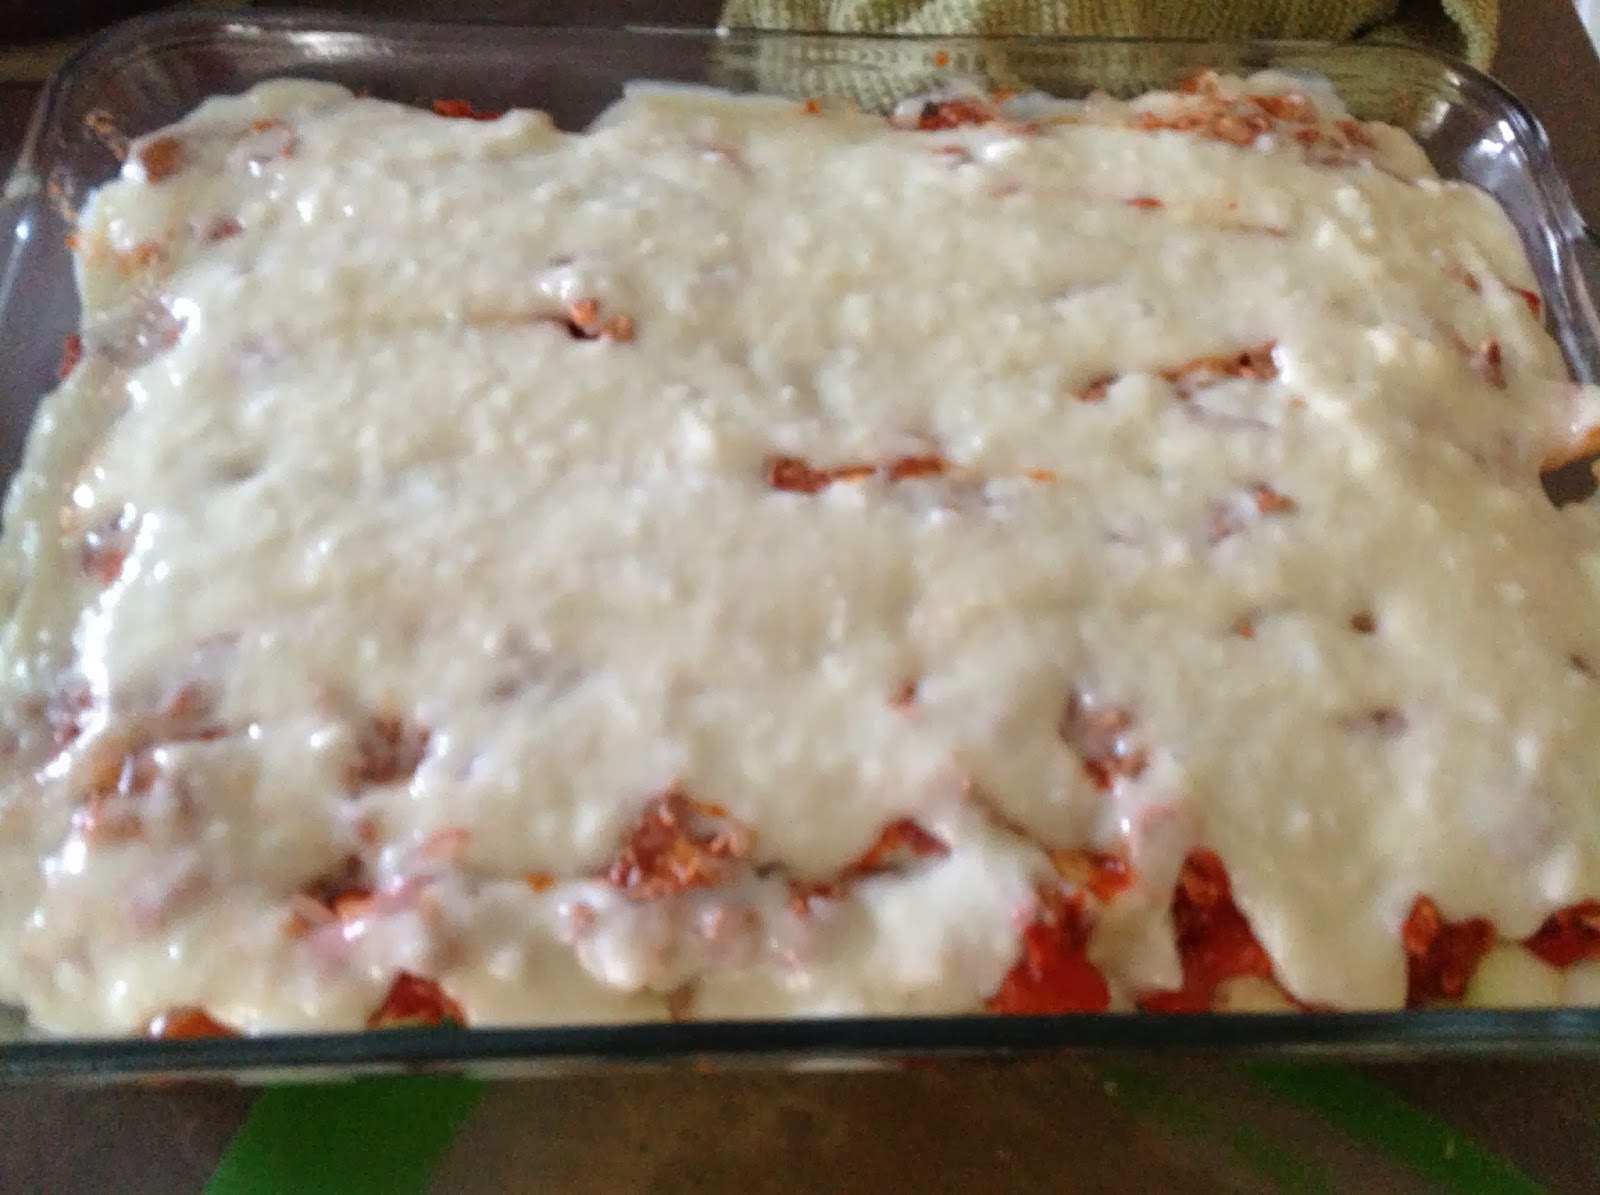
When I studied abroad in Greece, I discovered an amazing dish called Moussaka. Traditionally, this casserole is made with spiced ground lamb, eggplant, potatoes, and a creamy milk and flour based bechamel sauce on top.  It is hearty and homey like a good lasagna but with a more "exotic" flavor set.  A few weeks ago, Rem discovered a recipe for a paleo moussaka on the blog Real Food Forager.  We adapted it slightly to make a LOT more and to use ingredients we had on hand.  We've actually made it twice in the past few weeks and it turned out fantastic both times.  The bechamel sauce is unreal. As you can see in the pictures, broiling the moussaka for the last few minutes gives the bechamel that crusty, delicious brown on top which is reminiscent of broiled cheese.  There is still some in the fridge that I may need to go eat right now...  By the way, this tastes great cold as well as piping hot.  Is it weird that I tend to eat all of my leftovers cold?  Does anyone else do that?


Before baking.

After baking.  Mmmm....


Paleo Moussaka

Slightly adapted from Grassfed Girl via Real Food Forager

2 T coconut oil
2 small onions of 1 large onion, chopped
4 cloves garlic, minced
sea salt and pepper
2 lb. antibiotic and hormone-free ground turkey
2 tsp. cinnamon
1 6 oz. can organic tomato paste
1 15 oz. can organic no salt added tomato sauce
2 medium eggplants, skin peeled and chopped into bite sized pieces

2 cans full fat coconut milk
1/2 c arrowroot powder (I buy Bob'd Red Mill brand, which I have found at Kroger, Earth Fare, and Meijer)
2 eggs

Preheat oven to 375 degrees.  Melt coconut oil in large saute pan.  Add onions and garlic, saute 5 minutes. Add the ground turkey, salt, pepper and cinnamon. Cook, breaking up turkey, until ground turkey is cooked through. Add tomato paste, tomato sauce, and 1/2 can of water.  Stir and cook this for about 5 minutes more.
  
Meanwhile, grease 2 13x9 inch pans with coconut oil.  Peel and chop the eggplant into bite-sized pieces.  Place 1/2 of the eggplant pieces into each pan.  Then pour the meat mixture on top of the eggplant in each pan, splitting the amount evenly between the 2 pans.  

To make the bechamel sauce, mix 1 can of coconut milk with the 1/2 c arrowroot powder.  Pour of other can of coconut milk into a large sauce pan and heat until it starts to bubble (but not a full blown boil).  At this point, add the coconut milk/arrowroot powder mixture and whisk continuously until the sauce is very thick. Then remove the sauce from the heat, crack the 2 eggs into it, and whisk until the eggs are incorporated and the mixture is smooth. Pour the bechamel sauce over the meat mixture in each pan, splitting the amount evenly between the 2 pans.  

Bake both pans, uncovered, at 375 degrees for 40 minutes.  After 40 minutes, remove the pans from the oven, move the oven rack up one slot, and set the oven to BROIL.  Put the pans back in the oven and broil for 3-5 minutes or until the bechamel starts to brown (but not until it gets burnt).  Makes 8-12 servings.

Serve hot!  This also makes great leftovers.

Wednesday, February 5, 2014

Roasted Kabocha Squash

On this lovely Ohio snow day (Our 7th this year- what?!  At first I enjoyed these snow days but they're beginning to stress me out.  There is too much to teach and learn, and so little time!  Anyway, I digress...), as I was browsing through photos I've taken of recipes for this blog, I discovered some photos I had taken of kabocha squash and realized I never posted them!

A few years ago we were buying squash at Meijer when we discovered a type we had never seen before- kabocha.  It looks like a small, green pumpkin.  We took it home, looked up some ideas for preparing it online, and proceeded to make the BEST squash we had ever eaten.  When roasted in the way I will describe below, it is salty, rich, creamy, and downright addicting.  Be careful not to eat too much though... although the skin is perfectly edible, I have found out the hard way that eating too much of it is rather rough on the digestive system.  Just sayin'. 
Kabocha Squash

I've noticed that every kabocha squash I make has a slightly different flavor, and some turn out a bit drier than others, some creamier than others, and so on.  However, every time it has turned out DELICIOUS!


Roasted Kabocha Squash


1 kabocha squash (I can reliably find it at Meijer)
2 T coconut oil (or olive oil)
coarse salt

Preheat oven to 400 degrees and line 2 baking sheets with foil.  
Wash the squash.  Cut the stem end off.  Cut the squash in half down the middle.  Scoop out and discard the seeds and pulp.  Cut the squash into moon shaped pieces (approx. 1 in thick on the skin side, as pictured above).  
Melt the coconut oil on a heatproof plate (or just pour olive oil onto a plate). Rub one slice of squash in the oil, then rub another piece of squash onto the first to distribute the oil onto both pieces.  I know this sounds strange, but this is the method I've used since I starting make this squash and it works really well!  Really, just get some oil on the squash however you want!  
Place the squash slices onto the foil lined baking sheets and sprinkle with salt.  
Roast at 400 degrees for 20 min., then remove from oven, flip the squash, and bake for about 15 min. longer. When it's done, the squash should be soft enough to easily cut or pierce with a fork.  Enjoy!  Store in the refrigerator for up to 5 days.  In my opinion, it's just as good cold as it is freshly roasted!  

Saturday, January 4, 2014

Cilantro Lime Cauliflower Rice

Although cauliflower rice is often considered a great paleo substitute for rice, it is also just a delicious side dish in it's own right!  We love eating this version with taco meat or grilled chicken, guacamole, and salad.  


Cilantro Lime Cauliflower Rice

1-2 T coconut oil
1 large head (or 2 small heads) cauliflower
1 small red onion or 1/2 large red onion, minced
1/2 c fresh cilantro, chopped
juice of 1 lime

In a large skillet or dutch oven, heat the coconut oil on medium heat, then add the onion and saute until the onion begins to brown a bit.  Meanwhile, get out your food processor and use the grating attachment to "rice" the cauliflower.  It fills up the food processor pretty fast, so you'll need to do this in batches.  Once the onions are browned, add the riced cauliflower and cook 10-15 minutes or until soft.  Add lime juice, salt, pepper and cook 2 minutes more.  Then remove from the heat and stir in the cilantro.  Serve hot!


Apple Pie Bites

Very reminiscent of apple pie lara bars, these bite-sized treats are easy to make and satisfy any sweet craving!


Apple Pie Bites

1/2 c walnuts
1/2 c almonds
1/2 c cashews
10-12 medjool dates (the big, soft, chewy kind that still have the pits- but take the pits out!)
3/4 c dried apple slices
1 T cinnamon
1 T apple butter or applesauce

Process nuts in food processor until coarsely ground.  Add remaining ingredients and process until the mixture comes together and the nuts are finely ground.  (The mixture shouldn't be too wet or dry, but easy to roll into balls).  Roll mixture into balls (I made mine into balls that were about 1 1/2 inches in diameter) or press into a pan to make bars.  Store in the refrigerator or freezer.  You can eat these straight from the freezer, as they don't completely harden.  Enjoy!

Saturday, October 19, 2013

Creamy Tomato and Shrimp Soup

Last weekend my sister came to visit me for a cooking and baking extravaganza!  We both love to bake, cook, and eat delicious food, so we had an amazing time going through our "to make" recipe files and choosing some new dishes to cook.  We cooked turnips with bacon, onion, and turnip greens.  We roasted spaghetti squash.  We baked banana cardamom bread, pear cobbler muffins, and brownie bites.  And we made the most delicious dinner: homemade sushi and this creamy tomato and shrimp soup!  It's sweet, spicy, and full of tender vegetables and shrimp.  The soup was perfect on the cool fall day when we made it, and as most soups are, it was great the next day as leftovers.  


Creamy Tomato and Shrimp Soup

Adapted from Food and Wine

1 T coconut oil
2 onions, chopped
2 green bell peppers, chopped
4 cloves garlic, minced
1/2 tsp crushed red pepper flakes
32 oz. can diced tomatoes
5 oz. can tomato paste
2 cups chicken stock
15 oz. can coconut milk (full fat)
2 lb. raw shrimp, thawed (we used medium, frozen, wild caught shrimp from Meijer)
1/2 tsp freshly ground black pepper (we didn't measure- just put in a bunch)
juice of 1/2 a lemon
1/2 c chopped fresh cilantro

In a large pot or dutch oven, heat the coconut oil over medium heat.  Add onion, bell pepper, and garlic.  Cook, stirring occasionally, until vegetables start to soften and are fragrant, about 10-15 minutes.  Add the red pepper flakes, tomatoes, tomato paste, and chicken stock.  Let simmer for about 10 minutes.  Pour in the coconut milk, continuing to simmer for about 5 minutes.  Then add shrimp and cook for about 3-5 minutes more, or until shrimp are cooked through.  Just before serving, stir in the pepper, lemon juice, and cilantro.  Serve hot!  We ate it by itself but this would be delicious over rice or cauliflower rice.  


Monday, September 30, 2013

Mayonnaise!

I've been making homemade mayonnaise pretty regularly for quite a while now.  It is the perfect condiment to use as a salad dressing, on top of eggs, as a sauce for meat, as a dip for raw veggies, or as a dressing for chicken salad.

It wasn't HARD to make, but required a bit of patience to let the oil drip slowly into the egg as you mixed with the immersion blender.  I recently discovered a new recipe for homemade mayonnaise on The Healthy Foodie that has revolutionized my mayonnaise making!  You don't have to wait for an egg to come to room temperature.  You don't have to slowly drip the oil in.  Update your recipe file now to include this SUPER easy mayonnaise recipe!  The recipe calls for lemon/lime juice and light tasting olive oil, but I have subbed in equal amounts of apple cider vinegar (for the lemon/lime juice) and avocado oil (for the light olive oil) with equally delicious results.  If you haven't tried making your own mayonnaise, I encourage you to go for it!  You won't be disappointed!
Below are some mayonnaise flavors we regularly make and enjoy:

Roasted Red Pepper mayonnaise: after making the mayonnaise, add 4 jarred roasted red peppers, 2 cloves garlic and 1/2 tsp garlic powder.  Blend until peppers are completely blended into the mayonnaise.

Chipotle mayonnaise: after making the mayonnaise, add 4-5 adobo peppers (I use canned ones and rinse them before adding them to the mayonnaise).  Blend until peppers are completely blended into mayonnaise

Garlic and rosemary mayonnaise: after making the mayonnaise, add 1 T chopped fresh rosemary, 3 cloves fresh garlic, and 1/4 tsp coarse salt.  Blend until garlic is completely blended into mayonnaise.

Cilantro mayonnaise: Cilantro Mayonnaise

Curry mayonnaise: after making mayonnaise add (I use the curry mayonnaise in my Curry Chicken Salad) 3 T curry powder, 1 tsp ground ginger, 1/2 tsp garlic poweder, and 1/4 tsp each salt and freshly ground black pepper.  Blend until all spices are mixed in.

Monday, September 2, 2013

Tomato Basil Spaghetti Squash


I spent a long time trying to come up with a creative name for this recipe, but in the end I decided to just call it what it is.  Sometimes simple is better, right?  I combined some of the amazing produce from our CSA share this week to make this yummy dish that is refreshing yet filling.  

Tomato Basil Spaghetti Squash

1 large spaghetti squash, cooked and cooled (I recommend just making it a day ahead of time)
2 large tomatoes, chopped
1/2 c fresh basil, chopped 
2 cloves garlic, minced
freshly ground pepper (about 8 grinds)

In a large bowl, combine cooked and cooled spaghetti squash, tomatoes, basil, garlic, and pepper.  Before serving, add a sprinkle of sea salt.  Keeps in the refrigerator 1-2 days.  Serves 8 (large servings!)


Sunday, September 1, 2013

Beef and Sauerkraut


Although sauerkraut is mostly known for it's role in the classic New Year's Day "Pork and Sauerkraut," it's too delicious not to include in other dishes at other times of the year. This easy meal is perfect for a weeknight when you don't have a lot of time to cook, or on the weekend when you want to cook up a BIG batch of food for the week.  In the latter case, just double the recipe and you'll be good to go!

Beef and Sauerkraut

2 lb. grass fed ground beef
1 onion, diced
salt
freshly ground pepper
1 lb. sauerkraut (from a jar, with cabbage and salt as the only ingredients)

Brown beef and onion in skillet until beef is cooked through.  Add sauerkraut and cook on medium high for about 10 minutes more, or until sauerkraut is hot.  Enjoy!  Yes, it's that easy!

Sunday, July 28, 2013

Cilantro Mayonnaise

Homemade mayonnaise is one of my favorite things to make lately, and I've come up with an even tastier version!  This recipe was an attempt to replicate the famous Cilantro Sauce at the Venezuelan restaurant El Arepazo.  While I was not successful in making a sauce that tastes just like theirs, my sauce has similar flavors and is creamy, fresh, and particularly fantastic with salad, raw veggies, burgers, fish, and chicken.  It's especially easy to make now that we are growing an abundance of cilantro in our front flower beds! 


Cilantro Mayonnaise


2 eggs at room temperature
2 T fresh lemon juice 
1 tsp dried mustard powder OR dijon mustard
1 c light olive oil

1/2-3/4 cup fresh cilantro (no need to chop it up- just tear the leaves off of the stems)
1/2 large avocado
1/4 tsp salt
freshly ground pepper
a few shakes of cumin
a few shakes of cayenne pepper

Blend egg, lemon juice, mustard powder/mustard with immersion blender (or in food processor) until frothy.  Then slowly, drop by drop, add the light olive oil as you continue to blend.  Add oil slowly until it is all added, blending the whole time.  Continue to blend after you've added all of the oil until the mayonnaise has thickened, coating the head of the immersion blender.  Then add avocado, cilantro, salt, pepper, cumin, and cayenne.  Blend again until smooth.  Store in the refrigerator for up to 5 days.  
 

Tuesday, July 9, 2013

Melt-In-Your-Mouth Crockpot Whole Chicken


I made this chicken yesterday and was absolutely thrilled with the results!  Basically, I had a whole, thawed chicken in the refrigerator and wasn't sure what to do with it.  Rem makes some awesome beer can chicken and rotisserie chicken on the grill, but since I do not possess his grilling skills, I had to decide on some kind of indoor cooking method.  I had never tried a whole chicken in the crockpot so I gave it a stab and it was SO easy and SO good!  The only caveat is that the chicken skin does not get as crispy as when it is grilled or roasted in the oven.  But, slow cooked in the crockpot, the chicken gets so tender that it falls off the bone.  It literally does melt in your mouth!  I don't think I've had more tender chicken in my life!  I highly recommend this recipe for it's simplicity and superb taste.  

Melt-In-Your-Mouth Crockpot Whole Chicken

Originally from Paleo Slow Cooking by Chrissy Gower

1 fresh Bell and Evans Whole Chicken (3-5 pound chicken)
1 T coarse kosher salt
1 T freshly ground black pepper
1 T seasoning of choice (I used an Italian seasoning mix with garlic, basil, marjoram, thyme, and pepper)

1. Rinse chicken and remove giblets from the inside cavity if there are any.  
2. Dry chicken thoroughly and place in crockpot breast side up.  
3. Rub chicken (the whole outside as well as the inside cavity) with salt, pepper, and other seasonings.
4. Turn the crockpot to HIGH and set the timer for 5 hours (anywhere from 4-6 hours should work as well).
5.  No need to stir or do anything while the chicken cooks!  After 5 hours, your chicken will be ready to go. You'll know it's done because the chicken will be falling off the bone.
6.  Remove chicken from crockpot and place on cutting board or large plate  Separate into pieces for serving.  You probably won't even need a knife because the chicken is so tender that you can separate it into pieces with your hands!  

This chicken is delicious on it's own, served with some veggies on the side, but here are some other ideas for what to do with it:
1. Shred chicken with your hands and use as the base for your favorite chicken salad.
2.  After removing the chicken from the crockpot, strain the liquid that remains in the crockpot, getting rid of any solid pieces.  Pour the strained liquid back into the crockpot.  Shred the chicken and add it back to the crockpot.  Make your own chicken soup by adding some more water or chicken stock, vegetables, and cooked rice/quinoa/brown rice noodles.  Heat on low until the veggies are cooked through.

Monday, July 1, 2013

Paleo Stuffed Mushrooms

So far this summer we've had several potlucks and get-togethers with friends, and this dish (along with raw veggies) is one we have been taking to those events!  For the first potluck I decided stuffed mushrooms would be a great app to share with friends and then set about creating this recipe for stuffed mushrooms.  We had a bunch of fresh oregano from our CSA, and I knew I wanted to use ground beef as the basis for the filling.  Mushroom and garlic make everything better, and I thought the roasted red peppers would add a nice pop of color and flavor.  Because I don't eat gluten, I thought almond meal would be a good alternative to the traditional breadcrumbs used to thicken a meat mixture like the one I used to stuff these mushrooms.  With these ideas in mind I created this yummy filling for the mushroom caps.  I was extremely happy with the way these mushrooms turned out and have made them several times since creating the recipe!  The first time I made them, I used 2 lbs. of ground beef and had a ton of leftover "filling" mixture, so I used it to make meatballs!  The meatballs were fantastic!  I just formed the meat mixture into golf ball sized balls, placed them on a broiler pan, and baked at 350 degrees for 30-35 minutes.  


Paleo Stuffed Mushrooms


3 pints of baby bella mushrooms
coconut oil to grease pan
1 small white or red onion, minced
3 cloves garlic, minced
1/4 c fresh oregano, chopped
1/4 tsp dried thyme
1/4 tsp dried basil
1/4 tsp crushed red pepper
1/4 tsp salt
1/4 tsp pepper
1 lb. grassfed ground beef
2 roasted red/yellow peppers (I use a few pieces of the jarred kind), minced
1 egg
1/3 almond meal

1. Grease 13x9 glass baking dish with coconut oil.  Also put some coconut oil in a medium saute pan.
2. Wash mushrooms and carefully remove stems.  Mince stems.  Place mushrooms caps in glass dish.
3. Mince onion, garlic, and oregano.
4.  Heat saute pan over medium heat.  Add mushrooms stems, onion, garlic, oregano, dried basil, dried thyme, crushed red pepper, salt, and pepper (in the recipe I said "1/4 tsp" of each, but I really don't measure it, I just sprinkle "some" of each spice on top of the veggies).  Saute until mushrooms and onions are soft.
5. Meanwhile, chop roasted red peppers and add to large mixing bowl.  Also add: ground beef, egg, almond meal, and a light sprinkling of: more oregano, dried basil, dried thyme, crushed red pepper, and pepper.
6.  After onion and mushroom mixture is done cooking, add to the ground beef mixture and mix well with hands.
7.  Form meat mixture into small balls (about half the size of a golf ball) and place into mushroom caps.
8.  Bake mushrooms, uncovered, for 30-35 minutes at 350 degrees.
9.  Once mushrooms are done, remove from glass dish with tongs and place on serving tray or in another dish (so that they are not soaking in the fat).
10.  Serve hot!

Saturday, June 22, 2013

Homemade Almond Butter

We like almond butter... a lot.  So when Trader Joe's began having a shortage on their almond butter, I decided to make my own!  It tastes completely different than any store bought brand I've had, and I love it.  It has a different consistency (much thicker and less runny) and a fresher taste, plus I put cinnamon in mine which adds some depth of flavor.  

Don't get me wrong, I still love Trader Joe's almond butter... evidenced by the fact that I went EXTRA early one day this week and bought 8 jars :)  You see, lately they have been getting a small amount each day, so there's a limited supply that's gone by mid-day.  I went at 8 am when they opened to make sure they wouldn't be out!


Either way, homemade almond butter is amazing and something you should definitely try to make if you have a food processor or high powered blender.  Even though we have a large stock of Trader Joe's almond butter, I will still be making the homemade kind because it's just that good!!


Homemade Almond Butter

2 cups raw almonds
1/2 tsp cinnamon
a few pinches coarse salt

1. Get out your food processor.  I use a kitchen aid 5 cup food processor, so the directions that follow are what works for this food processor.  If you have a different food processor or a vita mix, your method may vary.  Just search for "homemade almond butter" and you will find lots of resources out there.  

2. Put 2 cups of raw almonds in the food processor.  We buy big bags of raw almonds (with the skin on) from Sam's club, and they work really well!  We store our almonds in the fridge, and in my experience, cold almonds work especially well for making almond butter.

3.  Turn the food processor on and process for about 2 minutes, or until you hear the blade whirring but not actually mixing anything.  At this point the almonds should be finely ground, and will probably have built up on the sides of the food processor.  Use a knife or the handle of a rubber scraper to push the meal off the sides of the food processor (and off of the bottom if necessary) and then turn the food processor on again.

4.  Continue to mix in 1-2 minute increments, turning the food processor off after 1-2 minutes and scraping anything that has clumped up on the sides and bottom.  Clumping is exactly what you should expect.  Just break it up with your knife or rubber scraper handle (don't forget the sides AND the bottom of the food processor) and distribute the mixture somewhat evenly in the food processor and continue to process in 2 minute increments.  

5.  The whole mixing process will take around 15-20 minutes, so don't worry if it doesn't seem like your almonds are making any progress!  They will!  It's kind of like magic at the end... you'll go for a while and think that nothing is happening, then all of the sudden- almond butter!  

6.  Eventually, the mixture will start to ball up, which means it's getting close to being creamy.  Continue your process of scraping the sides and bottom and distributing the mixture one more time.  

7.  The mixture will ball up again, and this time just let the food processor keep running, because the ball will "fall" and that's when the mixture will start to get creamy.  The inside of the food processor may also start to have some condensation and become hot.  This is normal!  

8.  Once the mixture is creamy and being whirled around the food processor evenly, add about 1/2 tsp cinnamon and a few pinches of coarse salt, and continue to process for about 1 minute.  

9.  Scrape the almond butter into a glass jar (don't use plastic) with a lid. 

10.  I know this will keep for up to 3 days, and would imagine it would be fine for around 2 weeks, but I doubt you will need to worry about that because I guarantee you will eat it all long before 2 weeks rolls around!

Wednesday, June 19, 2013

Fresh from the Farm!


This summer we decided to buy a CSA share from Wayward Seed, a local farm.  Each week for about 25 weeks we'll get fresh-picked, organic vegetables and fruits from the farm!  We got our first share last week and it definitely exceeded our expectations!  Everything we got was fresh and absolutely delicious.  It was fun to try out new recipes using some ingredients we don't normally use!  Here's a rundown of what we got and some ways we used it this week:

Napa Cabbage:

  • Used the outer leaves instead of romaine lettuce with the Turkey Lettuce Wraps.  
  • Chopped up the inner leaves to make Bobby Flay's Napa Cabbage Slaw- so delicious!  I changed the recipe a bit apple cider vinegar instead of rice vinegar, sesame oil and about 1/2 tsp crushed red pepper instead of the chili oil, and fish sauce instead of the soy sauce.

Arugula

  • We basically just ate this with our meals instead of spinach this week.  Makes for a tasty salad with any meat or veggies.

Butter Lettuce

  • My favorite salad I made this week was: butter lettuce (lots), roasted spaghetti squash (about 3/4 c), baked chicken thighs (4 oz), avocado (1/2), and a dressing with about 1 T olive oil, 1 T lemon juice, and a generous amount of salt and pepper.  

Fresh Oregano

  • I made a chicken marinade using 1/3 c olive oil, juice of 1 lemon, 4 cloves minced garlic, 1/2 c chopped fresh oregano, 1/2 c chopped fresh parsley, 1/4 tsp salt, 1/4 tsp pepper.  Then I marinated 4  fresh boneless skinless chicken breasts in that marinade for 24 hours.  After 24 hours I placed the chicken in a glass baking dish and made sure to cover it with all of the marinade (the marinade is very herby and thick, so you have to kind of scoop some of it onto the chicken with your hand).  Baked it, uncovered, at 400 degrees for 30 minutes (check to make sure the juices run clear).  

Kohlrabi

  • Kohlrabi has somewhat of a "sharp" taste, kind of like radishes.  It's crunchy and refreshing.  We washed it, cut it in half, peeled off the outer skin, then sliced it into thin chunks and ate for a snack or chopped on salads.

Snap Peas

  • We ate these whole, chopped and put in salads, and added to stir fry.  

Strawberries

  • These were some of the juiciest, sweetest strawberries I've had in a long time.  They were so delicious just raw!
  • One day I decided to get creative... I microwaved about 6 strawberries topped with 2 T coconut butter (not to be confused with coconut OIL- don't use coconut oil) for about 30 seconds.  It was heavenly...  Rem ate strawberries on top of his oatmeal each day!   

Green Onions

  • I used these in the Napa Slaw.  

Garlic Scapes 

  • To prep these guys, I just washed and cut them into about 1/8 in long pieces.  Several times this week I made an egg hash with them.  I put coconut oil in a pan or medium heat, added scapes, mushrooms, peppers, and zucchini.  Then I stirred and cooked them until soft, cracked 3 eggs on top, and sprinkled with salt, pepper, and garlic powder.  I cooked the mixture until the eggs were no longer runny.  

Do you have any good recipes for summer fruits and veggies?  Please share by responding to this post!

Saturday, June 15, 2013

Turkey Lettuce Wraps

For some reason I've been craving lettuce wraps lately, and the 5 lbs. of napa cabbage we got in our CSA have been a perfect excuse to eat lots of them!  Here is a great filling for lettuce wraps that Rem and I have made several times in the past few weeks.  We never seem to have as many leftovers as we think we will! 
The ingredients are simple, and each plays an important role in making the flavors of the dish pop!  Onion, garlic and mushroom are a great base for any flavorful stir fry, and minced fresh ginger adds a certain zing that is incredibly delicious.  The crushed red pepper adds the perfect amount of heat, and the water chestnuts add a necessary crunch.  


Turkey Lettuce Wraps


2 lb. ground turkey (I use Nature's Basket brand from Giant Eagle)
l large onion, diced
2 c sliced mushrooms
4 cloves minced garlic
3 T minced ginger
salt, pepper, crushed red pepper
1-2 T fish sauce
2 cans sliced water chestnuts, drained

Place ground turkey in a large skillet and heat to medium-high. (If it starts to stick, add a little bit of olive or coconut oil to the pan)  Stir and break up the turkey every few minutes.  As the turkey browns, chop up the onion, then add the onion and mushrooms, continuing to stir every few minutes.  While that cooks, mince the garlic and ginger, then add to the pan.  Next add salt (about 1/8 tsp), pepper (10-12 "cranks"), crushed red pepper (a light sprinkling over the whole pan), fish sauce, and water chestnuts.  Continue to saute this mixture until the turkey is cooked through and all ingredients are hot. Serve with romaine lettuce leaves or napa cabbage leaves.  Makes 4-6 large servings.  

Sunday, June 2, 2013

Roasted Asparagus and Red Pepper Chicken Salad

I was sad when I realized it's been a whole month since I last posted a recipe!  The past month has been very eventful and busy: 2 weddings (1 in Niagara Falls!), a fender bender which required lots of work, a trip to urgent care after biting it doing box jumps, getting to spend time with our families, a college reunion, a Girls on the Run 5k, and all the events that come with the last month of school!  I can't believe I'm almost done with my first year of having my own classroom!  It has flown by and has been truly great.  I am so thankful for this job, my wonderful students, and my amazing colleagues.  

Anyway, since summer is around the corner my goal is to post much more frequently!  Meanwhile, enjoy this yummy chicken salad that features roasted asparagus and fresh herbs.  It has tons of texture and flavor, and is fantastic served on a bed of greens.  


Roasted Asparagus and Red Pepper Chicken Salad

Originally from Multiply Delicious


Chicken Salad:
2 lb. cooked chicken breasts or thighs, cut into small pieces (I usually use boneless skinless thighs, place them on a foil lined pan, sprinkle with salt, pepper, and garlic powder, and bake at 400 degrees for 35-40 minutes)
2 cloves garlic, minced
1/2 c unsalted, roasted almond slivers
1/2 large red onion, diced
1 bunch asparagus (woody ends trimmed, coated in about 2 T coconut oil, sprinkled with salt and pepper, roasted in the oven at 375 degrees for 30-35 minutes)
1/4 c fresh basil, minced
1/4 c fresh parsley, minced
1/2 jar roasted red peppers (or red and yellow peppers), diced
salt and pepper

Dressing:
1/3 c fresh parsley
1/3 c fresh basil
2 T apple cider vinegar
1 T dijon mustard
1 tsp minced garlic
1/4 tsp salt
freshly ground black pepper
1/4 c extra virgin olive oil

Combine all chicken salad ingredients in large bowl.  For dressing, combine all ingredients except olive oil in food processor and blend OR in a bowl with tall sides, use an immersion blender to blend.  After the herbs, vinegar, mustard, garlic, salt, and pepper are mixed together, drizzle in olive oil as you blend until the dressing has a pourable consistency.  Pour dressing over the chicken salad and stir to combine.  Enjoy!  I like to eat this over a bed of spinach or mixed greens.  Makes about 6 servings.  


Saturday, April 27, 2013

Pad Thai

This is a super flavorful, easy meal that Rem and I made the other night and both LOVED!  We adapted it from many paleo pad thai recipes we found on various blogs out there.  I suppose I could call my version "two tablespoon" pad thai since I added that much of almost every ingredient.  This would be an easy recipe to memorize!

Instead of the traditional noodles used as the basis of pad thai, I decided to try using zucchini in their place.  I've never tried making "noodles" with zucchini before because I thought I needed a vegetable spiralizer, but as I searched for pad thai recipes I noticed that many cooks just use a vegetable peeler to create noodles from the zucchini.  I tried it and it worked perfectly!  Ironically, we also made brown rice pasta to go along with the pad thai (which you can see in the picture).  Also pictured are some steamed green beans.  I hope you enjoy this meal as much as we did!


Pad Thai


2 T coconut oil
2 large onions, diced
5 cloves garlic, minced
2 T ginger, minced
2 T apple cider vinegar
2 T raw almond butter
2 T sriracha
2 T fish sauce (I used Dynasty brand, which is only made from anchovies and water)
2 T lime juice
3 medium sized zucchinis, sliced into thin strips with a vegetable peeler (I tried to make the strips about 1/4 inch wide by turning the zucchini each time I sliced)
1-2 lb. chicken, cubed and cooked in sesame oil (exclude if you want to make just the noodles)

Heat coconut oil over medium-high heat in a large skillet or wok.  After the coconut oil melts, add onion, garlic, and ginger.  Saute for about 5-8 minutes or until fragrant and the onion has begun to soften, stirring around occasionally.  Stir in apple cider vinegar, almond butter, sriracha, fish sauce, and lime juice.  Add zucchini, cover wok, and cook about 10 min. or until zucchini is soft.  Take the lid off and stir occasionally during this time.  Then add chicken and cook for about 5 minutes more or until chicken is hot.  Enjoy!

Sunday, April 21, 2013

Zucchini Hummus and Baba Ganouj

A few weekends ago it was SO beautiful outside that we tried out the rotisserie on the grill and made our own rotisserie chickens!  And by "we," I mean Rem.  I was just the assistant who did things like run to the store to get butcher twine.  (On a side note: The Kroger on East Broad St. in Columbus has wonderful employees.  I went there looking for twine and asked a manager if they sold it.  He said he was sorry, but no they did not.  He asked me to wait for just a minute, went into the back of the store, and came back with about 4 feet of butcher's twine from the meat department.  He just gave it to me for free!  I was so grateful that I did not have to run around to other stores looking for it, and that this kind man just gave me what I needed!)  Anyway... the chicken was more tender than a store bought rotisserie chicken and more flavorful too. Plus it didn't have any extra sugar or artificial flavorings.  It was quite the process figuring out how to use the rotisserie for the first time, but boy was it worth it.  

To go along with the chicken we made a big salad and some Mediterranean style dips.  Both were equally delicious and paired perfectly with the chicken and salad for a light meal on a day that felt like summer!  Is it summer yet?  I can't wait!


Zucchini Hummus

Originally from Amazing Paleo

4 large zucchini
3/4 c tahini
2 T olive oil
8 T lemon juice (or about 4 fresh lemons, juiced)
4 garlic cloves
1 T cumin
1 tsp coarse salt
1/4 tsp paprika

Place all ingredients in food processor and blend until smooth.  I added the zucchini in about 3 batches because it wouldn't all fit in the food processor at first.  Refrigerate.  


Baba Ganouj


2 eggplants
1 T extra virgin olive oil
2 T tahini
2 more T extra virgin olive oil
1 garlic clove
1/2 tsp cumin
2 T lemon juice
1/2 tsp salt
a few shakes of cayenne pepper

Cut eggplants in half and brush cut side with 1 T olive oil.  Place cut side down on foil lined baking sheets and roast at 375 degrees for 35 minutes or until eggplants are very tender.  Let eggplants cool for about 10 minutes, then scoop out the flesh into food processor.  Add 2 T olive oil, tahini, garlic, cumin, lemon juice, salt, and cayenne pepper.  Process until smooth, then refrigerate.